


Views: 0 Author: Site Editor Publish Time: 2026-01-20 Origin: Site


Why do some arthroscopy images stay sharp when the joint is tight? Rigid Arthroscopes are built for that. They are straight scopes for minimally invasive joint work, helping surgeons see cartilage and ligaments.
In this article, we cover 0°, 30°, and 70° views, key specs, sterilization, and total cost.
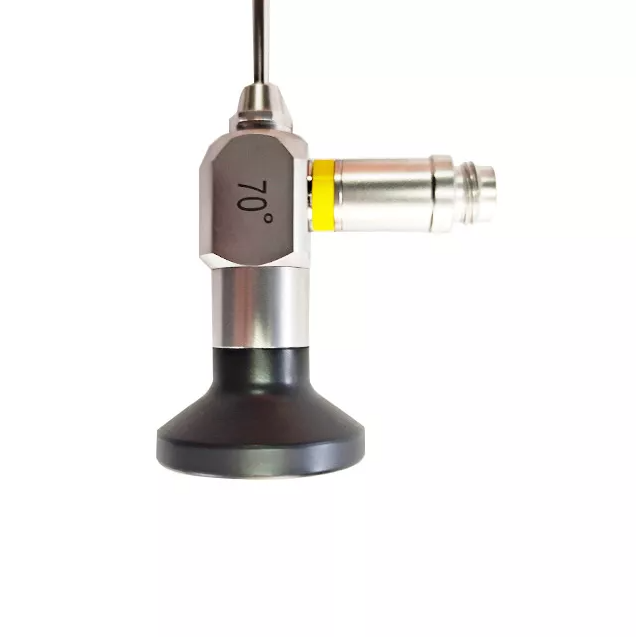
Rigid Arthroscopes keep a straight, fixed shaft during the procedure. This fixed geometry supports predictable motion inside tight joint spaces. Surgeons rotate and advance the scope for viewing changes. They do not rely on bending controls like flexible scopes. That stability helps when portals must stay small and precise.
In practice, it feels like “point and rotate” control. It helps teams keep consistent hand mechanics across cases. It also supports reliable instrument triangulation in narrow compartments. For buyers, it usually means fewer moving parts to fail.
Most rigid systems use rod-lens optics inside the shaft. Rod lenses transmit light efficiently and keep image edges crisp. Many teams notice less distortion during fast instrument work. It can feel more “true to anatomy” during cartilage assessment. Image quality still depends on the full camera chain.
Rod-lens designs can also keep straight lines straighter. That matters during suture management and anchor checks. If the system looks “washed out,” lighting is often the cause. We should assess optics and illumination together during trials.
Rigid Arthroscopes often range from about 1.9 mm to 4.0 mm. Smaller diameters can fit narrower joints and pediatric cases. Larger diameters can improve brightness and resist handling damage. Your case mix should drive the diameter choice, not marketing claims. A mixed set often serves hospitals better than a single size.
Smaller scopes may need more careful handling and protection. Larger scopes may accept higher flow and clearer irrigation. Some teams prefer two common diameters for standardization. That approach can reduce stocking complexity in sterile processing.
| Diameter (approx.) | Best fit use cases | Practical upside | Practical trade-off |
|---|---|---|---|
| 1.9–2.7 mm | Wrist, ankle, small joints, pediatrics | Easier access in tight spaces | Lower robustness; may need more careful handling |
| 3.0–3.5 mm | Mixed-service joints; general use | Balanced brightness and handling | Not ideal for the smallest spaces |
| 4.0 mm | High-volume knee/shoulder programs | Strong durability; strong brightness potential | Larger footprint; may limit access in narrow anatomy |
Angle choice shapes what you can see from one portal. A 0° arthroscope looks straight ahead and feels intuitive. A 30° arthroscope gives oblique views around corners. A 70° arthroscope can look “back” behind structures from one entry. Many teams build a set around the 0° 30° 70° arthroscope trio.
Angle selection also affects learning speed for new surgeons. It also affects assistant comfort during camera holding. A stable camera hand reduces motion blur and fatigue. It can also reduce repeated portal changes during inspection.
Angle selection table for daily work
| Scope angle used in arthroscopy cases | What the view helps you notice | Where teams use it most often | Common learning pitfall during early use |
|---|---|---|---|
| 0° arthroscope for straight visual orientation | It shows forward anatomy in a direct, intuitive line. | It fits basic diagnostic sweeps and tight, simple compartments. | It can miss around corners unless portals move. |
| 30° arthroscope for versatile corner views | It reveals recesses by rotation, not by portal changes. | They use it for knee and shoulder work in many centers. | It needs rotation discipline to avoid disorientation. |
| 70° arthroscope for extreme oblique inspection | It “looks back” to inspect hidden surfaces near portals. | It supports hip, posterior corners, and specific shoulder views. | It punishes poor spatial mapping and rushed instrument moves. |
Rigid systems depend on strong illumination and stable coupling. Light cables, connectors, and towers can reduce brightness if they age. A clear lens can still look dull when light delivery is weak. Camera heads and sensors also shape noise and color accuracy. Test the full chain during demos, not only the scope.
Check for flicker, hotspots, and color drift on white tissue. They can signal cable wear or connector issues. Ask vendors to show performance at real pump settings. Also test quick disconnects during wet glove handling. Small friction points can slow the case.
Arthroscopy uses small incisions called portals around the joint. One portal carries the rigid scope, and others carry tools. Surgeons aim for triangulation between scope and instruments. It supports controlled shaving, grasping, and repair placement. Common arthroscopy instruments include probes, graspers, shavers, and RF wands. The rigid scope’s stability helps when instruments move quickly.
Irrigation also shapes what they see during the case. Clear inflow and outflow reduce debris and fogging. Good seals reduce leakage and keep pressure stable. A professional design arthroscopic sheath can help here. It can also protect the scope during repeated insertions.
Rigid Arthroscopes often deliver high perceived sharpness in joints. Clear visualization helps during labrum repair and meniscus work. It also supports cartilage grading and synovial evaluation. Better clarity can reduce time spent “searching” for landmarks.
It can also reduce repeated probing during identification. That can protect tissue during complex repairs. Many teams value consistent clarity across staff shifts. That consistency supports predictable outcomes and smoother training.
Rigid scopes behave predictably when surgeons torque instruments. They resist bending forces during tight triangulation moves. That predictability can lower accidental tissue contact during repositioning. It can also reduce fatigue during long cases.
Stable handling matters when surgeons switch hands or portals. It also matters during fast shaver work. A stable view can reduce nausea and eye strain. That helps assistants and trainees stay engaged.
Rigid designs often have fewer moving parts than flexible scopes. Many models tolerate repeated sterilization when IFUs are followed. If they are autoclavable, they can fit fast OR cycles. Fewer failures can mean fewer case delays and rentals.
Autoclavable workflows can also simplify compliance checks. They can reduce reliance on special chemical steps. That can shorten turnaround when schedules are tight. It also supports standardization across service lines.
Most Rigid Arthroscopes fit standard arthroscopy towers and camera heads. They also work alongside common sheaths, cannulas, and obturators. This compatibility matters when budgets require phased upgrades. It also helps standardize training across surgeons and staff.
It can also lower integration risk for IT and biomed teams. Fewer adapters can mean fewer weak points and failures. Ask for connector specs and supported accessories. That step prevents surprise costs after purchase.
Rigid scopes cannot bend to follow curved pathways. Some views require portal changes or repeated repositioning. That can add time in small joints or complex hip anatomy. It can also increase the need for experienced spatial mapping.
This limitation shows up in narrow recesses and deep corners. Teams may need extra angles and smaller diameters. They may also need better portal planning and traction control. These needs should shape your training plan and inventory.
Flexible arthroscopes can navigate curved routes in select settings. They appear more often in veterinary or specialized applications. They can reduce portal changes when anatomy blocks direct lines. They may sacrifice some rigidity and durability in exchange.
They can also change instrument feel during triangulation. That may increase learning time for some surgeons. For many hospitals, rigid systems still cover most volume. Flexible options often stay in niche carts and specialty services.
Teams may see longer early cases when adding 70° scopes. They may also need more practice to avoid instrument clashes. Poor angle selection can create “blind zones” and repeat sweeps. A structured training plan reduces these risks.
We can reduce confusion with simple rotation rules. We can also label camera heads for angle sets. Some teams use brief simulation sessions before live cases. (Need verification) A short training block can reduce early OR time.
Resolution claims do not always translate into better decisions. Sharpness depends on optics, sensor quality, and lighting stability. HD can be excellent when optics and light are strong. 4K can help when monitors, cameras, and cables support true throughput. During demos, ask surgeons to judge cartilage edges and suture placement.
Also check dynamic range in bloody fields. Check color accuracy on tendon and bone. Poor settings can hide subtle cartilage changes. Ask for default profiles that match your OR workflow. Avoid systems that need constant tuning.
| Evaluation area | What to verify during demos | Why it matters in real cases |
|---|---|---|
| Optics + clarity | Edge sharpness on cartilage; distortion at periphery | Supports precise repair work and faster landmark finding |
| Light delivery | Cable condition; connector fit; brightness at real pump flow | Prevents “dull” images even when the scope is clean |
| Camera chain | Sensor performance; noise in low light; color stability | Improves decision quality in variable fields |
| Tower compatibility | Fits your existing tower, camera head, and connectors | Reduces hidden adapter cost and integration risk |
| Recording outputs | HDMI/SDI/network; file export workflow | Supports training, documentation, and teaching programs |
A scope can feel “heavy” even if grams look modest. Balance at the hand matters more than total weight. Grip texture helps when gloves get wet during irrigation. Poor ergonomics can raise fatigue in long shoulder cases.
Ergonomics also affects camera holders and trainees. Slippage can cause micro-shakes and blur. Ask to hold the system for ten minutes during demos. That test reveals real comfort and heat buildup. Comfort can improve focus and speed.
Reprocessing needs should fit your central sterile workflow. Many buyers search “autoclavable arthroscope degrees 0 30 70” during selection. They want angles that survive heat while staying optically consistent. Confirm IFU cycles, temperature limits, and drying requirements. Consider anti-fog practices that do not harm lens coatings.
Ask whether the scope is designed for repeated autoclave cycles. Confirm tray needs and protection caps during transport. Verify any cooling time requirements before use. Also confirm allowed detergents and enzymatic steps. These details reduce damage risk and service calls.
A professional design arthroscopic sheath can stabilize entry and reduce leaks. It can also protect the shaft during insertion and removal. Seal quality matters for irrigation control and clear viewing. Make sure sheath fit is consistent across your diameters and angles. Test assembly speed during a live workflow simulation.
Also check how seals behave during instrument exchanges. Leaks can soak drapes and lower visibility. A better seal can reduce pump demand and noise. Confirm sheath materials and durability under heat. Ask for spare seal availability and pricing.
| Service profile | Recommended angle priority | Typical rationale |
|---|---|---|
| Knee-heavy | 30° first, then 0° | 30° covers most views; 0° helps training and straight orientation |
| Shoulder-heavy | 30° first, then 70° | 70° supports corner inspection and behind-structure views |
| Multi-joint | 30° + 0° baseline, add 70° selectively | Standardization plus targeted capability expansion |
| Small-joint growth | Keep 30° baseline, add smaller diameters | Access drives value; training prevents early inefficiency |
Modern ORs often need recording for training and documentation. Confirm output types like HDMI, SDI, or network streaming. Ask how metadata and timestamps are handled in recordings. Verify compatibility with your PACS or teaching systems. Clunky capture can slow staff and frustrate surgeons.
Also check storage limits and file formats. Confirm whether clips export easily for education. Ask about cybersecurity requirements for network capture. If they require logins, confirm user management. These points matter for hospitals and teaching centers.
Knee work often uses a 30° rigid scope as a default. It supports meniscus trimming, repair, and loose body removal. It also helps assess chondral lesions across compartments. Shavers and punches are common arthroscopy instruments here. Stable visualization helps when switching between medial and lateral work.
It also supports notch inspection and ACL evaluation. Clear views help confirm meniscus root integrity. It can also help locate small loose fragments. Efficient switching between portals supports shorter case time. That matters for high-volume outpatient lists.
Shoulder cases often benefit from angle flexibility. A 30° scope handles many glenohumeral evaluations. A 70° scope can help inspect behind structures from one portal. Subacromial work may demand strong lighting and good fog control. Clear imaging supports anchor placement and cuff mobilization.
It also supports biceps anchor checks and capsule inspection. It can help during knot management and suture passage. A stable view reduces time spent reorienting. That helps when multiple assistants rotate in teaching cases.
These joints can feel tighter and more constrained. Smaller diameters may matter more in wrist and ankle work. Hip work often benefits from skilled portal planning and oblique viewing. Angle choice can reduce portal changes during complex inspection. Teams should plan training before expanding into new joints.
Fluid management also becomes more sensitive in small joints. Seals and cannulas play a bigger role in visibility. Good traction control supports safer hip viewing. Angle sets can also reduce repeated sweeps in tight spaces. That helps when time and swelling increase quickly.
Diagnostic sweeps favor intuitive orientation and wide visibility. Operative work favors stable imaging under instrument stress. For repairs, clarity and coupling stability can matter most. For diagnosis, ergonomic comfort can matter during long surveys. Many services keep both priorities in a balanced scope set.
In diagnostic work, a 0° scope can support fast mapping. In operative work, a 30° scope often stays dominant. For niche corners, 70° can save portal changes. The right mix reduces friction between surgeons and staff. It also supports consistent tray builds.
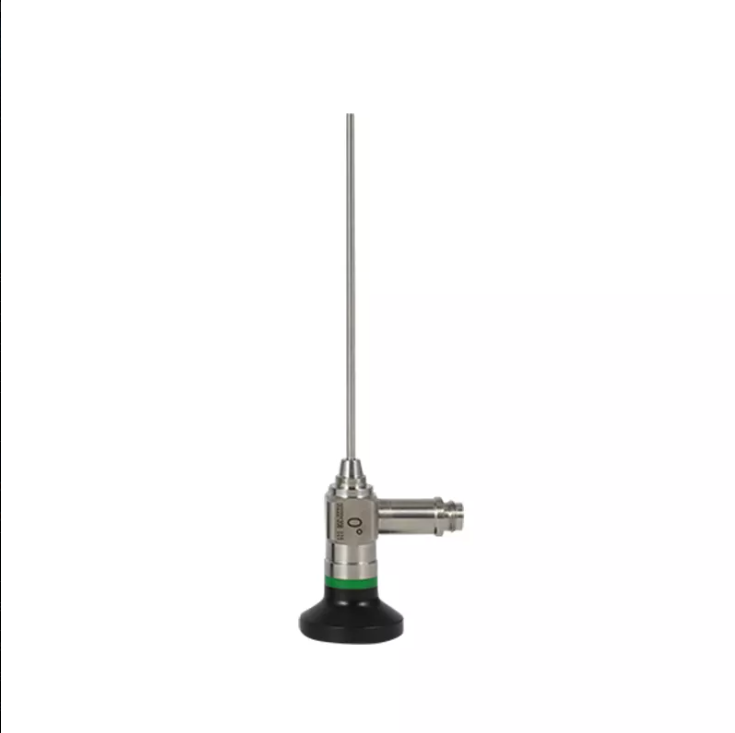
Rigid Arthroscopes often tolerate high-temperature sterilization when designed for it. If they are autoclavable, turnover can be faster and simpler. That can reduce reliance on chemical high-level disinfection. It can also reduce odor and storage burdens in some workflows. Always follow IFUs and local policy for each device.
Autoclave compatibility can also support consistent cycle logging. It helps sterile processing teams reduce variation. It also supports predictable scheduling in busy blocks. Confirm packaging and tray requirements for each scope. Small details can change cycle capacity and cost.
Most scope failures come from drops, impacts, or poor storage. Rod-lens systems can crack or decenter after a hit. Caps and trays should protect the distal tip and eyepiece. Staff should avoid twisting connectors under tension. A simple handling checklist prevents costly repairs.
| Step | What staff does | Common failure it prevents |
|---|---|---|
| Transport | Move scopes in trays, not loose hands | Drops and impact damage |
| Pre-case check | Inspect tip window and connectors | Surprise fog, dim light, image dropouts |
| Cable discipline | Avoid sharp bends and tension | Intermittent brightness loss, connector wear |
| Storage | Use padded, ventilated racks; avoid stacking | Tip scratches, lens decentering |
| Incident logging | Report impacts and unusual resistance | Repeat failures and delayed repairs |
A small “do not stack” rule can prevent tip damage. Clear labels can reduce mix-ups between diameters. A dedicated transport cart can reduce drops in corridors. These steps often cost little and save repairs.
Fog can ruin visualization and waste OR minutes. Warm irrigation, lens warming, and approved anti-fog solutions help. Quick leak checks prevent fluid ingress and later corrosion. Document issues immediately to speed service decisions. A loaner program can protect schedules during repairs.
Also check connectors for wear and looseness. A loose coupling can create intermittent image dropouts. Set a simple pre-case check for light and camera locks. Add a post-case wipe step before drying. These routines reduce repeat problems and delays.
Purchase price is only one cost driver in arthroscopy. Repairs, shipping, downtime, and loaner fees can dominate later. Service coverage terms often matter more than list discounts. Usage volume also shapes whether extra spares pay off. (Need verification) Some centers see higher repair rates during training expansions.
Ask for typical repair categories and costs in writing. Ask for average turnaround times and loaner terms. Confirm whether damage is “covered” or “billable.” Also confirm whether sheaths and seals are consumables. These items can shift annual budgets quickly.
Start by listing your top procedures by volume. Knee-heavy services often prioritize 30° scopes and durable sheaths. Shoulder-heavy services may add 70° scopes for specific views. Multi-joint services benefit from mixed diameters and standardized connectors. Case mix should guide spares and loaner needs.
Also check surgeon preference patterns and staffing coverage. A service with rotating staff needs more standardization. A service with high outpatient volume needs faster turnover. Align scope sets with sterile processing capacity. That alignment often prevents bottlenecks and delays.
Many services begin with two 30° scopes for redundancy. They often add a 0° scope for training and simple diagnostics. They add a 70° scope when surgeons request deeper corner views. They select smaller diameters when wrists, ankles, or pediatrics are common. This approach reduces waste and speeds adoption.
A starter set also supports predictable tray builds. It helps staff learn assembly and handling faster. It can reduce “one-off” requests that slow turnover. Add spares when volume rises and repairs increase. Use real utilization data to justify expansion.
Some buyers prefer integrated towers for simple operation. Others prefer modular builds for future camera upgrades. Check how cameras, light sources, and pumps connect and update. Confirm whether software updates require service calls. Plan for monitor upgrades if you adopt 4K workflows.
Also plan for recording needs in teaching hospitals. Check network policies for streaming and storage. Confirm whether the tower supports future sensors and cables. Ask for a roadmap that fits your replacement cycle. This planning reduces surprise costs in year two.
Rigid Arthroscopes remain the standard because they deliver stable, sharp joint visualization and predictable control during demanding instrument work. Many teams rely on 0° 30° 70° sets, and buyers should focus on optics, ergonomics, sterilization fit, and service terms, since these factors shape performance and ownership cost. A professional arthroscopic sheath can improve handling and reduce leakage, and the best results come when the scope set matches the case mix. HENGJIA can add value by offering dependable rigid arthroscopy solutions, practical sheath options, and responsive support for busy surgical workflows.
A: Rigid Arthroscopes are straight scopes for minimally invasive endoscope joint viewing.
A: Rigid Arthroscopes use 0° for straight views, 30° for corners, 70° for hidden areas.
A: Many Rigid Arthroscopes are autoclavable; follow IFU for safe sterilization cycles.
A: Rigid Arthroscopes commonly pair with shavers, probes, graspers, and RF tools.
A: A professional design arthroscopic sheath helps Rigid Arthroscopes reduce leakage and protect shafts.
A: Rigid Arthroscopes may look dim due to worn light cables or poor camera coupling.


