


Views: 0 Author: Site Editor Publish Time: 2026-01-25 Origin: Site


Is rigid arthroscopy really endoscopy, or something different? It is joint endoscopy, done through small portals. Rigid Arthroscopes give stable optics and precise control. In this article, you will learn the terms, key angles, and the workflow.
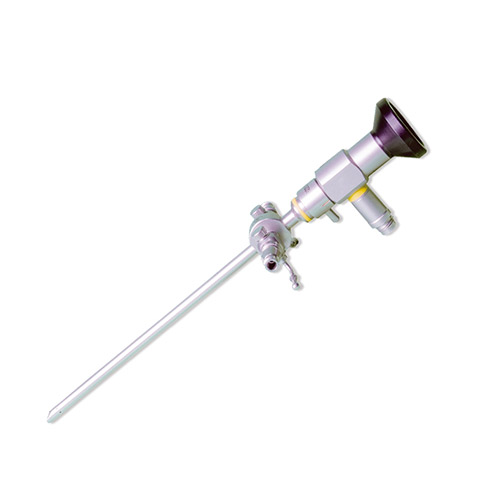
Endoscopy means we look inside the body using a scope. The scope carries light and a viewing system. The image goes to a screen, so we can work visually. The route can be natural, or through a small cut. The key idea is visual guidance inside tissue spaces. So the route does not define endoscopy by itself. If a scope gives internal vision, it fits the concept. That is why many specialties use endoscopy daily.
Arthroscopy is endoscopy of a joint space. We place a scope into the joint through portals. We inspect cartilage, synovium, ligaments, and loose bodies. We can also treat problems in the same session. It is still endoscopy, just in a joint. It uses a camera view to guide every move. It also uses specialized tools for joint tissue. So it feels different, but the principle matches.
Most joints need clear images and stable positioning. A rigid scope holds its shape during torque and movement. That stability helps tool control in tight spaces. It also reduces image wobble during cutting or shaving. For many teams, it shortens the learning curve. It also supports repeatable steps across cases. When the view stays steady, decisions feel easier. That is why Rigid Arthroscopes are common in standard rooms.
Many endoscopies use natural openings like mouth or rectum. Arthroscopy usually uses two to four small incisions. Those are called portals, not “open surgery” cuts. The goal stays the same: see inside and treat safely. Portals also allow instrument access from different angles. That lets the surgeon work without a large incision. It also helps reduce soft tissue disruption in many cases. Patients often notice smaller scars and less early pain. Yet they still need a rehab plan for full recovery.
Arthroscopy belongs under the endoscopy umbrella. It is one specialized branch. Endoscopy also includes laparoscopy, cystoscopy, and bronchoscopy. Those do not target joints, so they are not arthroscopy. So the relationship is one-way, not equal. This rule helps readers avoid word confusion. It also helps teams explain procedures faster. When we label it clearly, expectations improve.
An arthroscope is the device. Arthroscopy is the procedure using it. People often mix these words. Clear wording helps patient trust and team alignment. It also helps in procurement documents. Buyers should name the device and the workflow. That avoids wrong quotes and mismatched parts. It also improves training communication across staff. A shared vocabulary reduces friction.
| Term | Plain meaning | What it is NOT | Why it matters |
|---|---|---|---|
| Endoscopy | Viewing inside the body using a scope and a screen | Not limited to natural openings | It is the umbrella concept |
| Arthroscopy | Endoscopy of a joint space | Not the same as open joint surgery | It explains the “yes” answer clearly |
| Arthroscope | The device used to see inside the joint | Not the procedure itself | It prevents wording confusion |
| Portal | Small incision for scope/instrument entry | Not a large “open” incision | It sets patient expectations |
| Rigid Arthroscopes | Straight, stable scopes used in most arthroscopy | Not flexible scopes | It explains why “rigid” is common |
A typical setup has a rigid telescope scope, plus a camera head. It connects to a light source via a light cable. A video processor sends the signal to a monitor. Many rooms also add recording and image capture. The scope is the “eye,” but the stack drives performance. The camera head affects color and sharpness. The light source affects brightness and shadow detail. The monitor size affects how teams interpret anatomy. When one part is weak, the whole system feels weaker. So the scope should be evaluated as a system.
| Component | What it does | What to check in practice |
|---|---|---|
| Telescope (Rigid scope) | Provides the optical view inside the joint | Diameter, angle options, optical clarity |
| Camera head | Converts optics into a digital image | Weight, heat, color stability, connection reliability |
| Light cable | Delivers light from source to scope | Cable durability, connector fit, strain relief |
| Light source | Controls brightness and illumination stability | Brightness consistency, heat management, lifespan |
| Video processor | Processes image signal and reduces noise/lag | Latency, sharpness, color accuracy, settings simplicity |
| Monitor | Displays the surgical view for the whole team | Size, resolution, viewing angle, glare control |
| Recording/capture | Stores images and video for audit/teaching | File format, storage path, easy export |
Rigid Arthroscopes often come in small diameters for tight joints. Common diameters range around 1.9 mm to 4.0 mm. The viewing direction usually comes in 0°, 30°, and 70°. That is why buyers search “0° 30° 70° arthroscope.” Each angle changes what you can see without moving portals. A good angle choice can reduce time and improve safety. A 0° scope looks straight ahead for simple orientation. A 30° scope gives a wider working view in many joints. A 70° scope helps see recesses behind structures. Teams often rotate the scope to change view direction. Rotation skill matters more than people expect.
| Arthroscope angle | Best use | Typical advantage | Common trade-off |
|---|---|---|---|
| 0° | Straight inspection and quick orientation | Simple mental mapping | Less “around-corner” visibility |
| 30° | Most routine arthroscopy work | Versatile view across compartments | Needs rotation awareness |
| 70° | Recesses and hard-to-see regions | Better look behind structures | Higher learning curve |
| Note for buyers | Autoclavable options vary by model | Faster turnover in some facilities | Confirm validated cycles and limits |
Many facilities prefer autoclavable scopes for predictable turnover. Yet not all scopes tolerate the same cycles. You should confirm validated steam parameters and cycle counts. You should also confirm what parts need low-temp methods. “Autoclavable arthroscope degrees 0 30 70” is a real sourcing question. It matters for cost and downtime, not just convenience. Reprocessing is also a safety issue. A rushed process can leave soil or residue. A careful process protects patients and protects optics. Facilities should align scope choice with local sterilization capability. That prevents avoidable workflow disruptions.
Many systems use a sheath around the scope. A well-designed sheath helps fluid flow and protects optics. It can also improve ergonomics during long cases. Some sheaths include inflow ports and secure locks. A “professional design arthroscopic sheath” reduces leaks and slippage. It also helps keep the image cleaner during debris load. Sheath fit also affects scope stability inside portals. Loose fit can cause micro-movement and blur. A stable sheath can make navigation feel smoother. Teams should also confirm sheath compatibility across brands. Small mismatches can cause costly delays.
Higher resolution can show subtle cartilage changes. It can also help new staff orient faster. But resolution alone is not everything. Optics, light, and processor tuning shape clarity. 4K can look great, yet it can raise costs. For many centers, HD plus good optics hits a sweet spot. Color accuracy matters during synovitis assessment. Low noise matters in darker joint corners. Lag matters during fast tool movement. Buyers should test image response in real lighting. They should also test during fluid turbulence. Those moments reveal true performance.
Rigid scopes can last long when handled well. Yet they still need careful transport and cleaning. Most damage comes from drops, cable strain, or harsh brushes. A good workflow includes protective trays and clear ownership. Reprocessing training often saves more money than discounts. Simple handling rules reduce repairs. Clear labeling reduces mix-ups between angles. Routine leak checks reduce hidden damage. A documented process also helps audits and quality tracking. Over time, uptime becomes a key value metric.
The surgeon makes small portals near the joint. The arthroscope enters through one portal. Instruments enter through other portals. The camera shows structures on a monitor in real time. This reduces blind probing and helps precise targeting. Portal placement also affects reach and safety. A small change can improve access to a tear edge. Teams often plan portals based on anatomy and imaging. They also adjust based on patient size and joint stiffness. Good portal planning reduces tool conflict in tight spaces. It also supports smoother triangulation during treatment.
Many arthroscopies use irrigation fluid. Fluid distends the joint and clears debris. Distention creates working space for instruments. Pump settings and outflow control affect clarity. Poor control can cloud the view and slow progress. Teams should treat fluid management as a core skill. Too much pressure can increase swelling risk. Too little pressure can collapse the view space. Flow also affects heat management near tools. Clear outflow paths prevent fog and debris buildup. When the view stays clear, the case stays calm.
Arthroscopy instruments include probes, graspers, scissors, shavers, and burrs. Many sets include punches for meniscus work. Radiofrequency tools may help hemostasis and tissue smoothing. Triangulation means the scope and tool form a working triangle. Good triangulation improves reach and reduces iatrogenic damage. Teams practice it like camera navigation in laparoscopy. Instrument length and shaft stiffness also matter. Poor fit can reduce control and increase fatigue. A sharp shaver can remove tissue quickly, so control is crucial. A probe helps confirm tear stability before cutting. A grasper helps retrieve loose bodies safely. Matching instruments to the scope angle supports smoother work.
Arthroscopy often causes less soft tissue disruption. Many patients have smaller scars and faster early mobility. Pain can still be real, especially after repairs. Swelling can limit motion for days or weeks. Rehab plans depend on what we fix, not just the portals. A simple debridement may recover faster. A meniscus repair may restrict weight bearing longer. A ligament reconstruction can require structured rehab stages. Patients should expect a plan, not a guess. Clear instructions reduce setbacks and anxiety. Good follow-up helps catch stiffness early.
Arthroscopy targets a joint space filled with fluid and tissue surfaces. Many other endoscopies target lumens like bowel or airway. This changes lighting needs and camera movement. It also changes how tools interact with tissue. Joint spaces have reflective cartilage surfaces. Small glare changes can hide a defect. Lumens often have continuous walls and folds. So navigation landmarks differ across fields. Yet the shared idea remains visual control. That is why arthroscopy still fits endoscopy.
A colonoscope travels through a natural lumen. An arthroscope enters through a created portal. Portals allow direct, controlled entry, but they require sterile field work. The risk profile shifts toward skin prep and instrument handling. Teams must respect both routes. Portal placement also influences nerve and vessel safety. That is why anatomy knowledge is essential. A natural-orifice endoscopy focuses on mucosal safety. Arthroscopy focuses on joint structures and portal safety. Both demand careful technique and clear training.
Joint structures can look similar under fluid and light. A small change in angle can reveal a tear edge. Mucosa has different landmarks and patterns. So training differs, even if both are endoscopy. This helps explain why orthopedic teams rely on rigid optics. Cartilage defects can be subtle and shallow. Ligament fibers can blend into background tissue. A crisp image supports confident identification. That reduces unnecessary tissue removal. It also supports better documentation for outcomes review. Clear visibility improves learning for trainees too.
Rigid tools excel when the path is short and direct. Flexible tools excel when the path bends and curves. Joints often favor direct entry and stable control. So rigid arthroscopy fits the anatomy well. Even when access is hard, angle changes can help. Portal repositioning can also solve many issues. That is why Rigid Arthroscopes remain the default for many centers. Flexibility is useful, but not always necessary. The best choice follows anatomy and workflow needs.
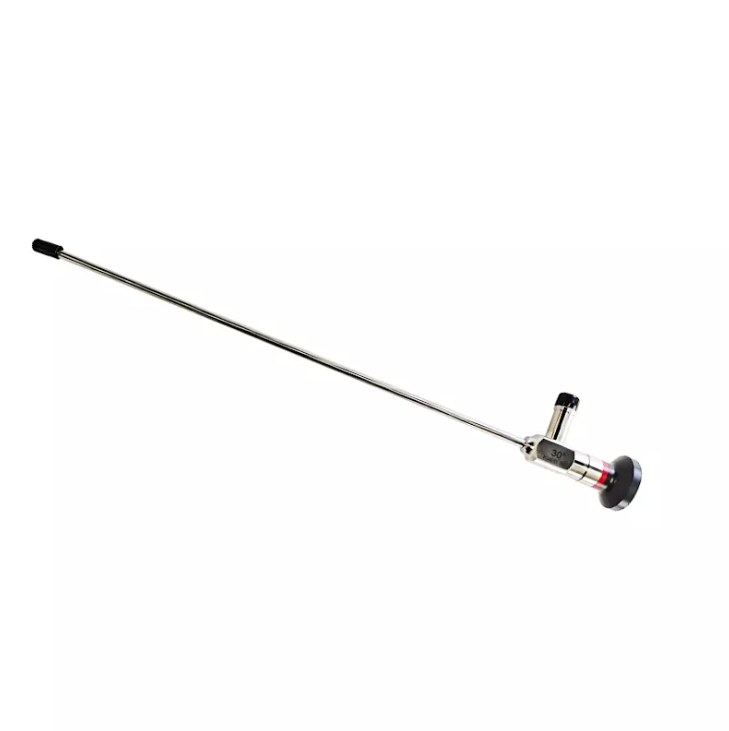
Rigid scopes often deliver sharper images per cost. They also resist bending under hand force. Many standard instruments are built around rigid workflows. This makes room setup faster and more consistent. It also simplifies reprocessing and storage. It supports predictable training for new staff. It can reduce repair frequency in busy rooms. For many hospitals, reliability matters most. That is why rigid systems scale well.
Flexible arthroscopes may help in very small joints. They may also help when access paths curve. Yet these cases are less common in many centers. Many teams can solve access by portal planning. So flexible use stays niche in many workflows. Some teams use flexible scopes in wrist cases. Some use them for rare visualization needs. Adoption often depends on surgeon preference. It also depends on maintenance support capability. Without support, flexible systems become a burden.
Flexible scopes can be harder to maintain. They may need more frequent servicing. They can also be more sensitive to heat and handling. Some teams accept this for rare cases. Others prefer rigid plus smart portal strategy. Image quality can vary across flexible designs. Durability can vary by bending radius and storage method. Service costs can also be higher over time. These trade-offs matter in total cost analysis. Buyers should look beyond sticker price.
A purchasing team should map real procedure volume. It should list joint types, surgeon preferences, and expected growth. Then it should match scope options to that map. This keeps the system useful for years. Case mix should also include revision work. It should include teaching needs and staff turnover. It should include reprocessing capacity constraints. When teams align these factors, choices become clear. It also reduces internal debate later. The best system is the one they will use daily.
Arthroscopy can reduce muscle cutting and soft tissue trauma. It often supports faster early function and smaller scars. Many cases can be outpatient or short-stay. It can also improve diagnostic accuracy inside the joint. It allows direct inspection of tissue surfaces. It also allows targeted treatment in the same setting. That reduces the need for large exposures in some cases. Yet outcomes still depend on diagnosis and rehab. Good expectations support better satisfaction.
Common targets include meniscus tears and cartilage damage. It may assess ligament injuries and synovitis. It can remove loose bodies and inflamed tissue. It may also help manage early arthritis symptoms. Final indications depend on clinical evaluation. Imaging guides the plan, but direct view confirms it. Surgeons may choose repair or debridement based on tear type. They may also address impingement and labral issues in some joints. Indications vary by joint and patient goals. That is why consultation matters.
Rigid scopes cannot bend around corners. Some joint regions need portal changes or angle swaps. This can add time in complex cases. Visibility can also drop during bleeding or heavy debris. Skill and planning reduce these limits. A 70° scope can reduce some repositioning. Better fluid control can reduce bleeding haze. Clear instrument coordination can reduce camera collisions. Yet rigid limits still exist in tight anatomy. Teams should acknowledge them in education materials. Honest framing builds trust.
Sterile technique is critical, even for small portals. Teams need validated cleaning, leak checks, and sterilization steps. Handling should protect distal optics and light posts. Clear protocols reduce breakage and infection risk. Point-of-use cleaning should start right after the case. Delays can harden debris and increase damage risk. Brushes should match channel sizes and recommendations. Packaging should prevent tip contact during transport. Routine audits help maintain consistency across shifts. A strong process supports both safety and cost control.
Start by ranking your top joint procedures. Knees often need fast turnover and rugged scopes. Shoulders may benefit from angle flexibility and strong fluid control. Hips may require specific access tools and longer instruments. Your scope choice should follow this reality. Volume also affects how many spare scopes you need. High volume needs redundancy for repairs. Teaching centers may need extra sets for training. Outreach clinics may need portable stacks and quick setup. A clear map prevents underbuying and overbuying.
Optics quality drives detail and depth perception. Common viewing directions include 0°, 30°, and 70°. Many teams standardize on 30° as a default. Then they add 0° for straight-line inspection. They add 70° for “around-the-corner” views. Illumination stability matters during long cases. Ergonomics matters when you operate for hours. Weight balance affects hand fatigue during camera holding. Connector quality affects signal stability and downtime. Anti-fog performance affects case flow in humid rooms. These details often decide user satisfaction.
Many centers want easy recording for education and audit. Some want wireless streaming or EMR integration. These features can help, but they must be stable. Training should cover camera orientation and white balance. It should also cover fluid setup and trouble shooting. A smooth workflow saves more time than fancy menus. Standard checklists help reduce setup errors. Clear cable routing reduces trip hazards and disconnections. Simple user interfaces reduce staff stress during emergencies. Consistent documentation supports quality improvement discussions. It also helps new surgeons learn from past cases.
You should confirm regulatory approvals for your market. You should review service coverage and parts availability. You should ask about scope exchange and loaners. You should confirm expected repair pricing ranges. Red flags include vague sterilization guidance and slow service. Another red flag is unclear compatibility claims. Buyers should also confirm consumable availability. They should confirm software update policies and support terms. They should confirm spare parts lead times and shipping routes. They should ask about training support for nurses and techs. Risk control protects uptime, not just compliance.
Below is a simple reference for common viewing directions.
| Arthroscope angle | Best for | Typical advantage | Common trade-off |
|---|---|---|---|
| 0° | Straight inspection and orientation | Simple mental mapping | Less “around-corner” visibility |
| 30° | Most general arthroscopy work | Versatile view across compartments | Needs rotation awareness |
| 70° | Recesses and hard-to-see regions | Better look behind structures | Higher learning curve |
If your case mix is standard, start from rugged Rigid Arthroscopes. Choose angles that reduce portal changes and time. Confirm autoclavable pathways and validated cycles for your facility. Then align instruments, sheath design, and service terms. A clear checklist keeps cost, uptime, and outcomes aligned. When you test systems, mimic real cases. Use fluid, instruments, and normal lighting conditions. Ask users for feedback after hands-on trials. Their comfort often predicts long-term adoption. A good fit reduces hidden costs later.
Rigid arthroscopy is joint endoscopy, so it follows the same rule: see inside and treat under vision. Rigid Arthroscopes dominate because they give stable optics and reliable control, while 0°, 30°, and 70° viewing angles help teams adjust the view fast. Reprocessing readiness also matters, especially for autoclavable workflows, because it supports safe turnover and steady performance. HENGJIA adds value through reliable arthroscopy scopes and responsive service, helping facilities reduce downtime and keep results consistent.
A: Yes. It uses portals and a camera; Rigid Arthroscopes give stable control.
A: They stay steady and sharp; Rigid Arthroscopes support precise arthroscopy instruments use.
A: It is the viewing direction; Rigid Arthroscopes swap angles to see corners fast.
A: Not always; check cycle limits; Rigid Arthroscopes vary by model and IFU.
A: Better flow and less leakage; Rigid Arthroscopes work smoother with a fitted sheath.


